
Item Swap
This guide covers the Item Swap feature for exchanging the positions of two items within the same container or between different ones.
1. Using the Item Swap Tool
The swap operation is designed for simplicity and direct coordinate exchange between two specific item instances.
Execution Steps
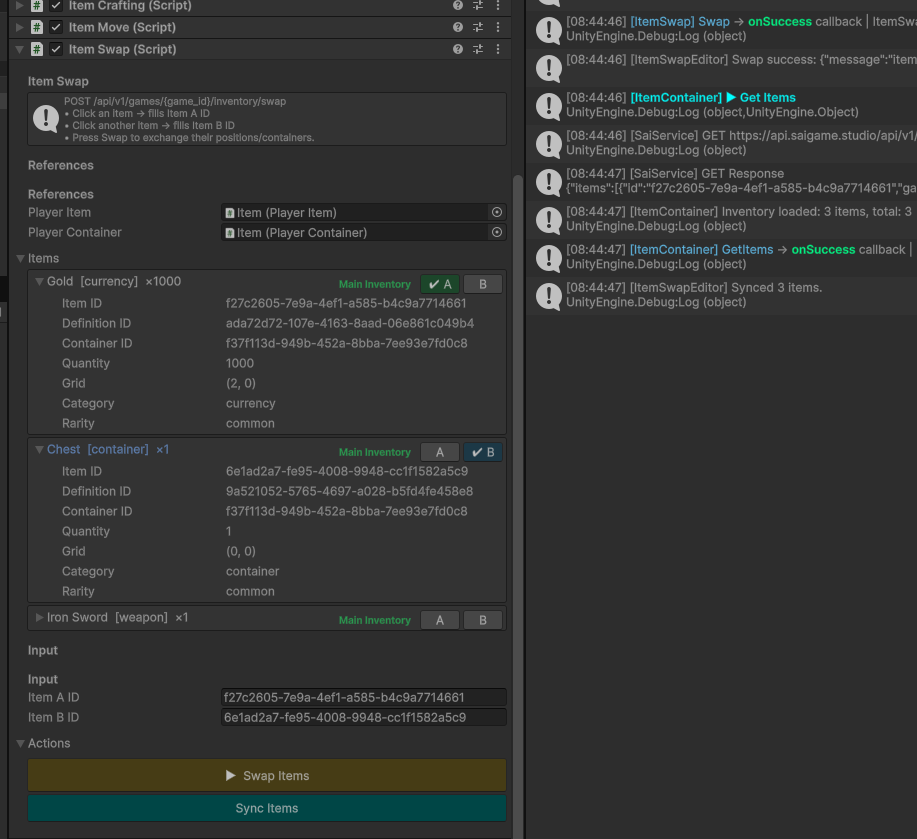
- In the Unity Hierarchy, locate the Item Swap class component (situated immediately next to the
Item Moveclass). - Selection:
- Select Item A (the first item you wish to move).
- Select Item B (the second item you wish to move).
- Execute: Click the Swap Items button.
- Result: Item A will move to Item B's exact previous coordinates, and Item B will move to Item A's exact previous coordinates.
- Make sure you click the Sync Items button to see the final result, or check it in Sai Game Admin for a clearer view.
2. Cross-Container Support
The system is flexible regarding storage locations:
- Intra-Container: Swapping items within the same grid (e.g., swapping a sword at 0,0 with a shield at 0,2 in the Main Inventory).
- Inter-Container: Swapping items between different storage units (e.g., swapping an item in the Main Inventory with one inside a Chest).
3. Constraints and Failure Conditions
To ensure data integrity and prevent grid overlapping, the system enforces strict validation:
- Collision Check: The swap will fail if either item lacks sufficient empty space at its new destination.
- Logic: The system does not "push" or "auto-rearrange" surrounding items. It strictly attempts to place Item A into Item B's footprint and vice versa.
- Dimensions: If you attempt to swap a large item (e.g., 2x2) with a small item (e.g., 1x1), the swap will only succeed if the space occupied by the larger item's new position is entirely clear of other objects.
Note: If a swap fails, the server will return an error, and both items will remain in their original positions. Always ensure the grid footprints are compatible before initiating the request.