
Import Unity Package
This guide outlines the initial setup for integrating the SaiGame SDK into your Unity project.
1. Prerequisites & Installation
- Game Registration: Ensure your game is already created in the SaiGame system.
- Unity Version:
- Recommended: Unity 6.x or newer.
- Legacy Versions: If you are using an older version and encounter issues, please contact Sai for support.
- SDK Setup:
-
Download the latest Unity Package from this link.
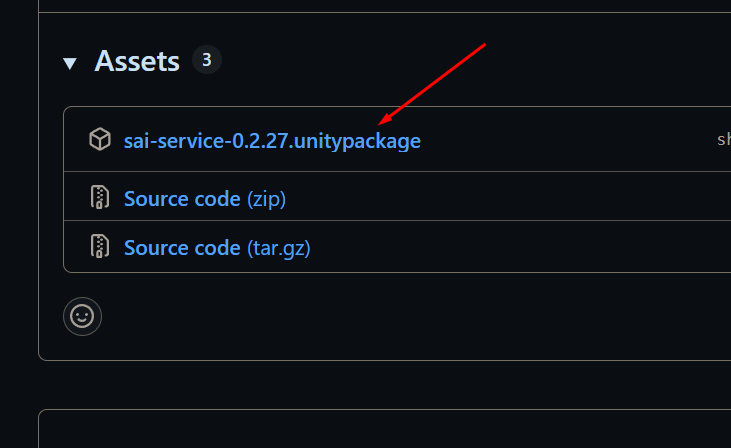
-
Import the package into your project.
-
Drag the
SaiServerprefab fromAssets/SaiGame/Prefabsinto your scene. All services (authentication, items, quests, battle…) are already wired inside it.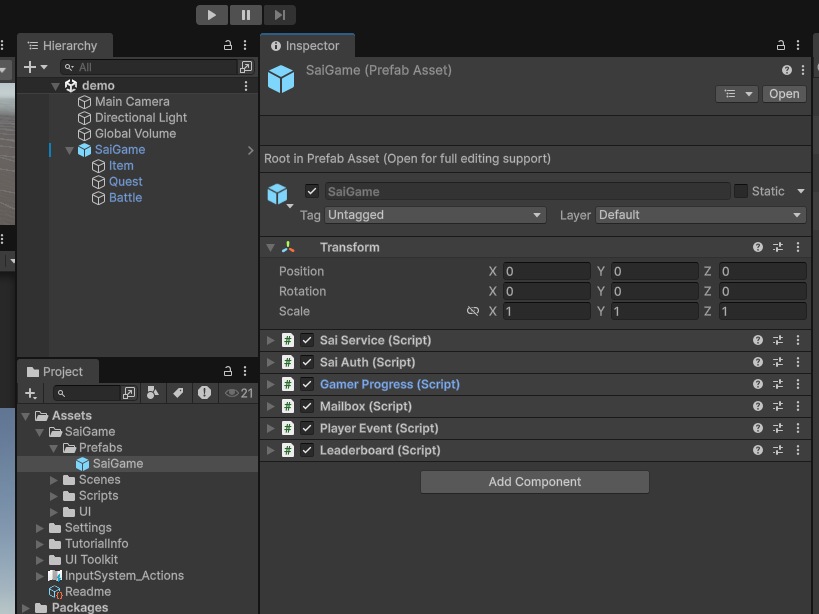
-
2. Configuration
Select the SaiServer object in the Hierarchy. Its Inspector contains everything needed to connect your project to the backend.
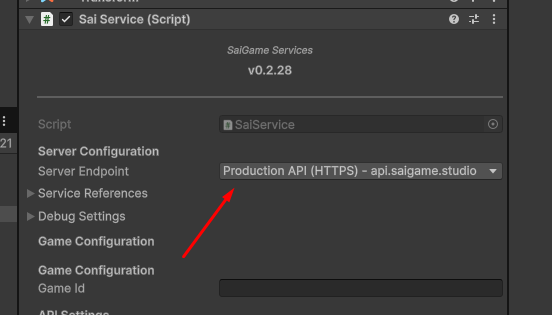
Server Endpoint
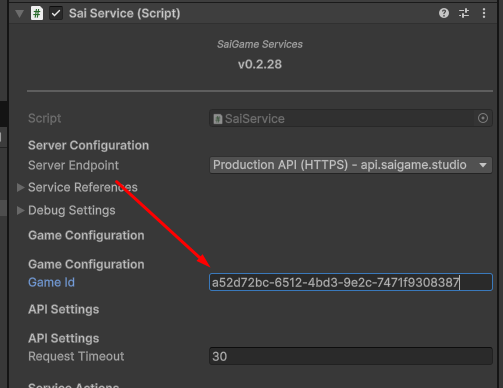
Set Server Endpoint to Production API (HTTPS) - api.saigame.studio so you are interacting with live data. This is the default value.
Game Identity
- Go to your Game Detail page on the dashboard and copy the Game ID.
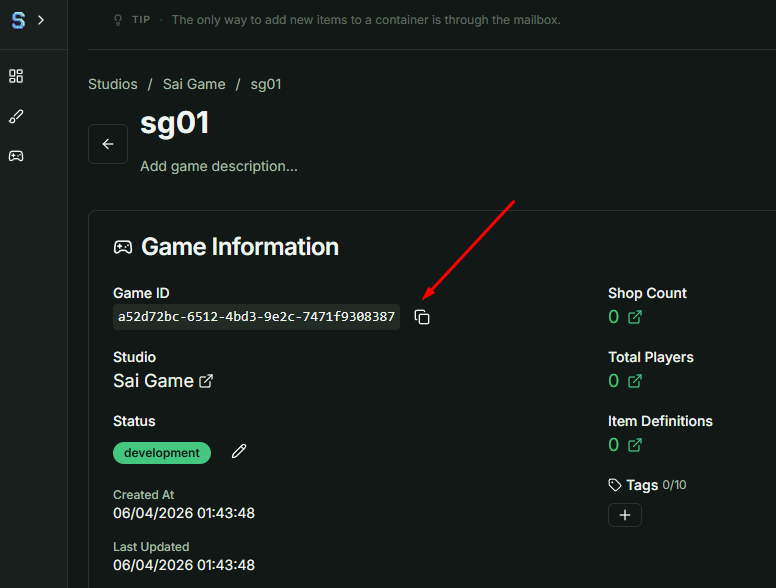
- In the Unity Inspector, select the
SaiServercomponent. - Paste the ID into the Game ID field.
Optional: Use a .env File
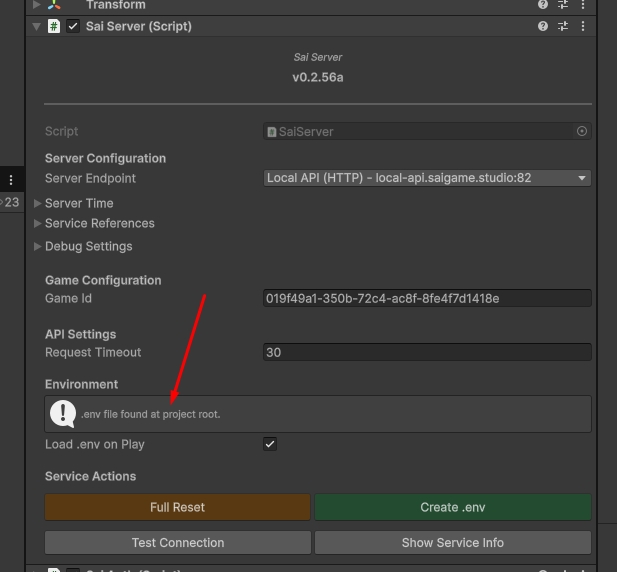
Instead of typing the Game ID and test credentials into the Inspector, you can keep them in a .env file:
- In the
SaiServerInspector, click Create .env. This copiesAssets/SaiGame/env.txtto a.envfile at your project root. - Open
.envand fill inGAME_ID,USERNAMEandPASSWORD. - Enable Load .env on Play. When you enter Play Mode, the Game ID is applied to
SaiServerand the credentials toSaiAuth.
Note:
.envmust never be committed to source control. Credentials loaded from it are stored in PlayerPrefs only, not in the scene file.
Verify the Connection
Click Test Connection in the SaiServer Inspector. A ✓ Connection test passed! message in the Console confirms that Unity can reach the server. Show Service Info prints the current base URL and login state.
3. Authentication & Testing
Switch Unity to Play Mode to begin testing the integration.
User Authentication
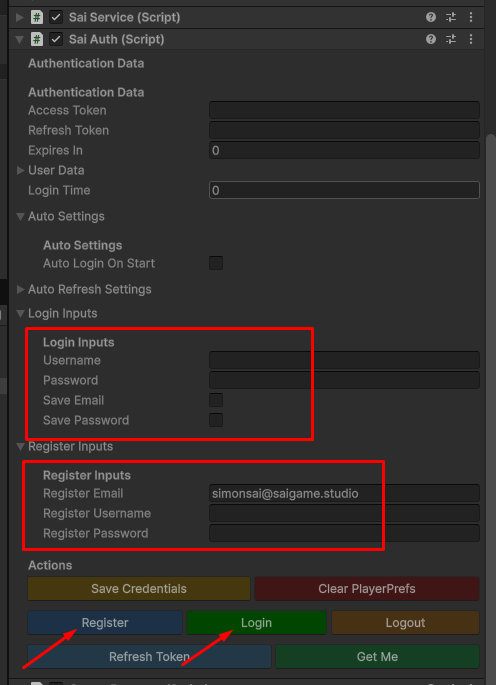
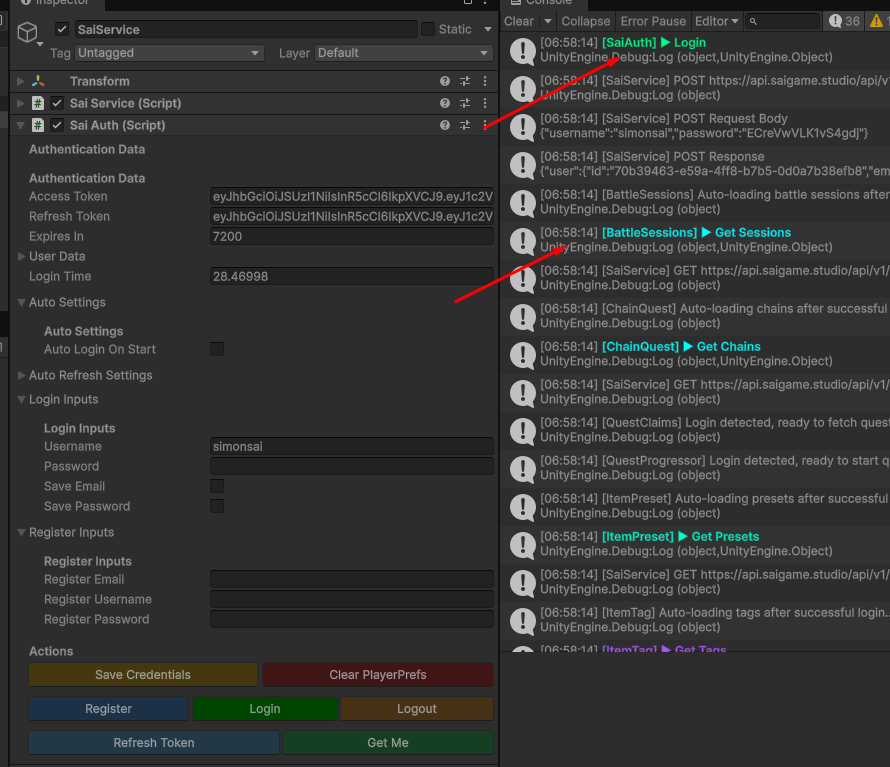
Use the SaiAuth component to perform the following actions:
- Register a new account.
- Login with existing credentials.
- Get Me to load the current user, Refresh Token and Logout.
Google Login (Optional)
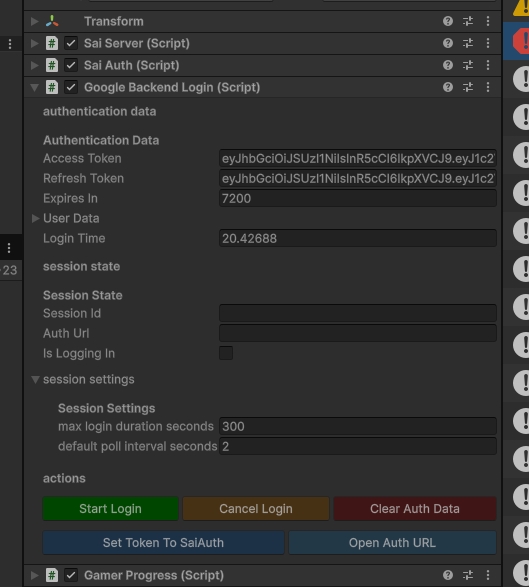
Players can also sign in with Google through the GoogleBackendLogin component:
- Click Start Login. A browser window opens the Google sign-in page.
- Complete the sign-in in the browser. Unity polls the server and, once the login succeeds, passes the tokens to
SaiAuthautomatically. - Use Cancel Login to abort, or Open Auth URL if the browser did not open.
Debugging & Implementation
The Inspector includes helper buttons for rapid testing.
- Console Shortcuts: Every time you click a test button, a Color Log will appear in the Console.
- Code Navigation: Clicking the log entry will take you directly to the function responsible for that logic. You can use these functions as a reference when writing your custom game scripts.
4. Next Steps
- Successfully logging in or creating an account creates a system user, but it does not automatically register them as a "Player" within your specific game.
- We will cover the logic for converting a user into an active Player in the next tutorial.
- There is much more to discover within the
SaiServerandSaiAuthcomponents, feel free to explore them at your own pace.