
Group by Tag
This guide explains how to effectively organize and retrieve items using Categories and the Item Tags system.
1. Item Categories vs. Item Tags
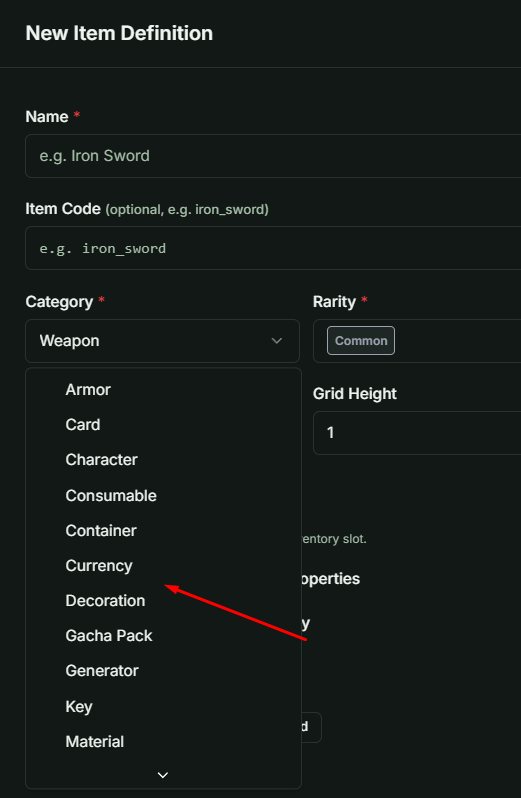
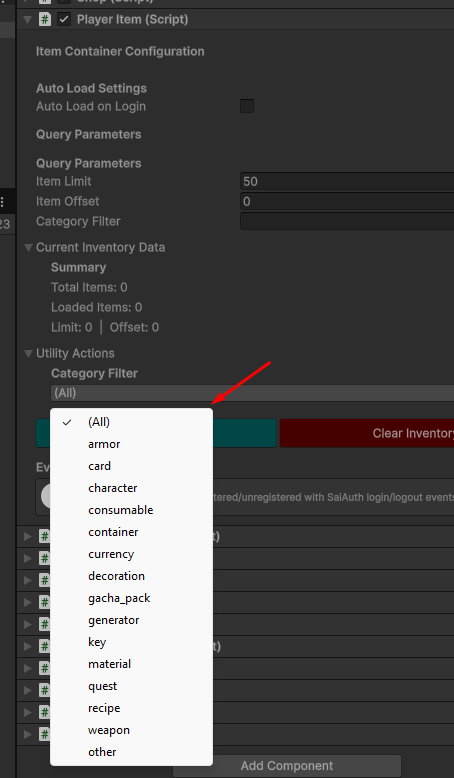
When creating an Item Definition, you can assign it a Category. In Unity, you can retrieve items based on these categories, which serves as a primary "Group By" function.
 |  |
|---|
However, for more complex sorting, such as grouping items by custom keywords, rarity, or event types, you should use Item Tags.
2. Usage & Limits
Item Tags provide a flexible way to filter items without impacting your project's resource limits:
- No Usage Cost: Creating a new Item Tag does not consume an "Item Definition" usage unit.
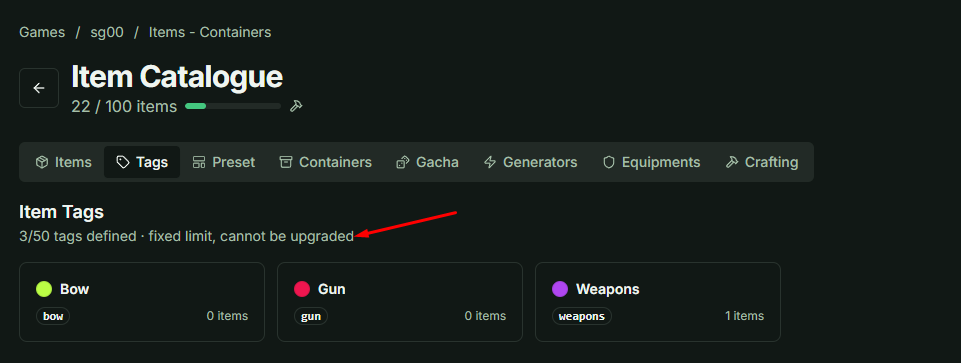
- Global Limit: Each game is limited to a maximum of 50 defined tags. This limit is fixed and cannot be upgraded.
- Per-Item Limit: A single Item Definition can be associated with up to 20 different tags.
3. Configuration Workflow
- Create Tags: Navigate to the Items/Tags management section to define your custom keywords.
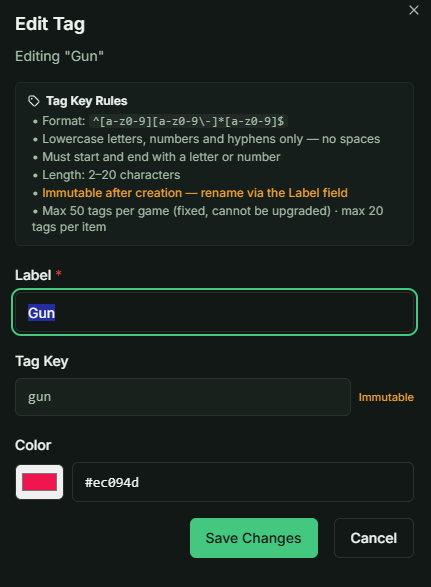
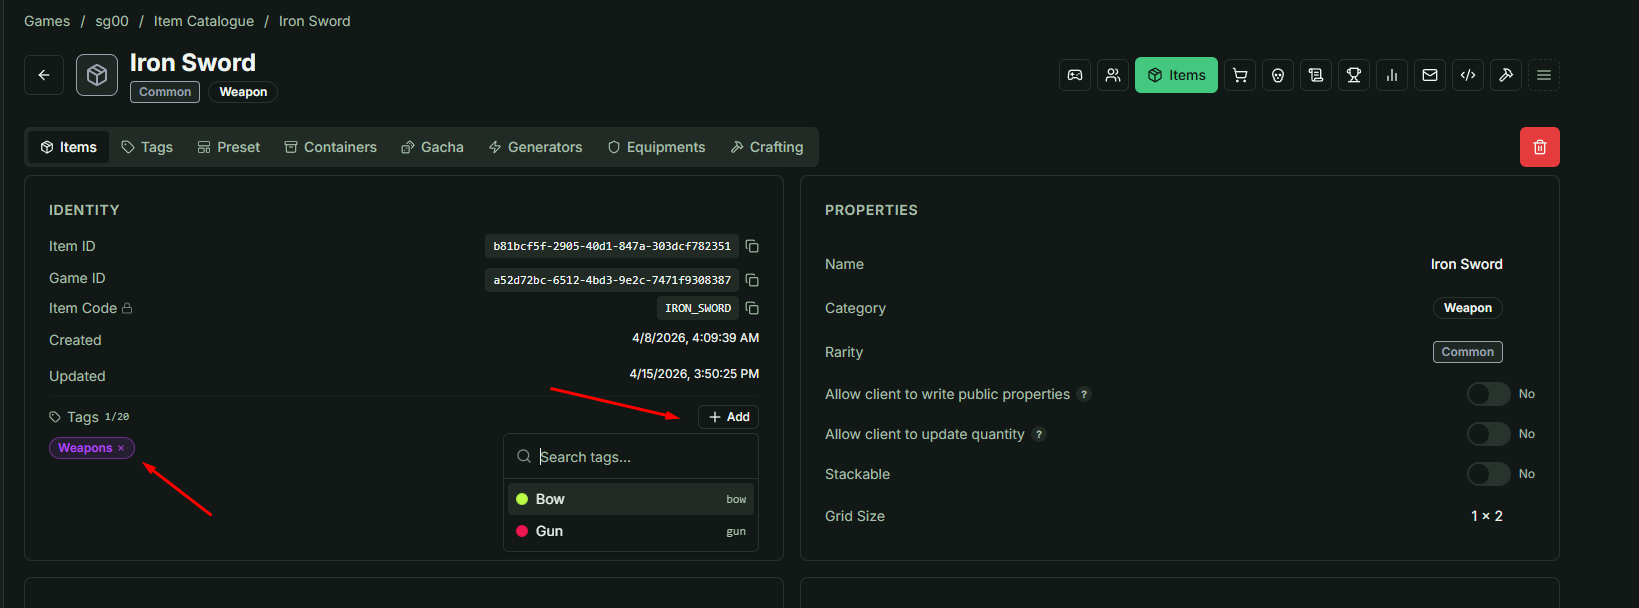
- Assign Tags: Open the Edit Item Definition page for a specific item. You can then select and attach the relevant tags to that item.
4. Unity Integration
From the Unity client, you can perform the following actions via the game client:
-
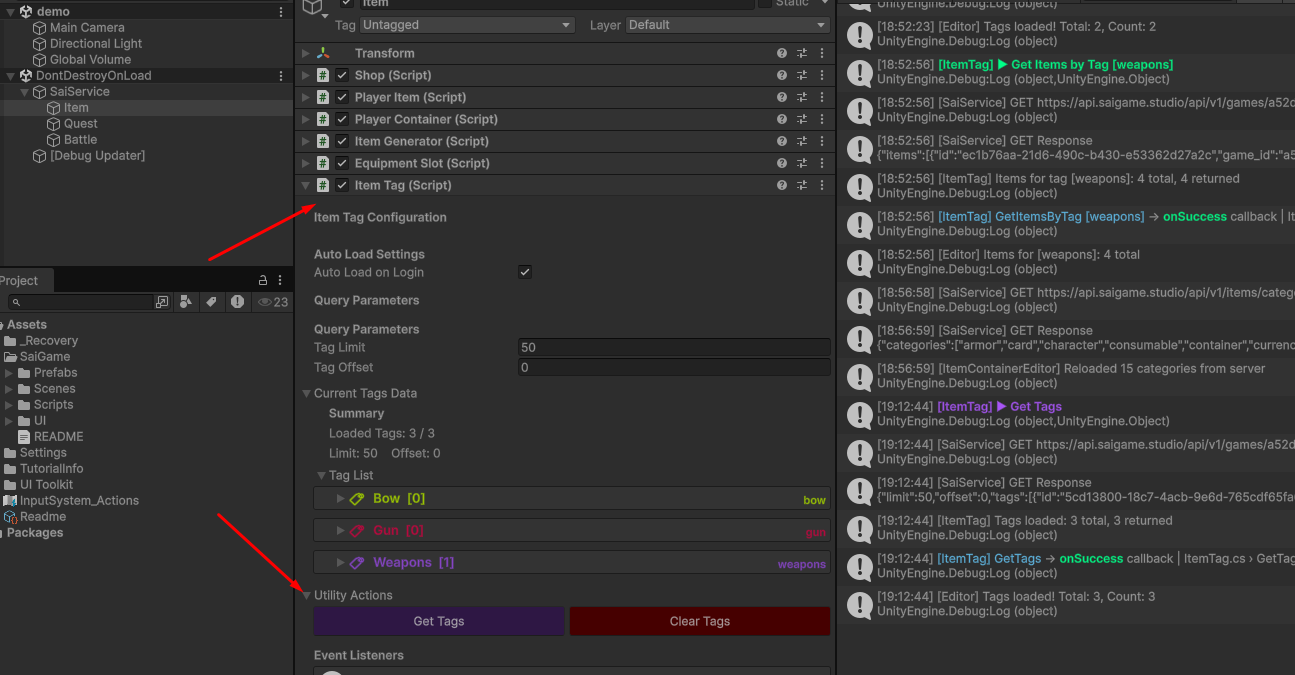
Fetch Tag List: Retrieve the complete list of custom tags you have defined in the Web UI.
-
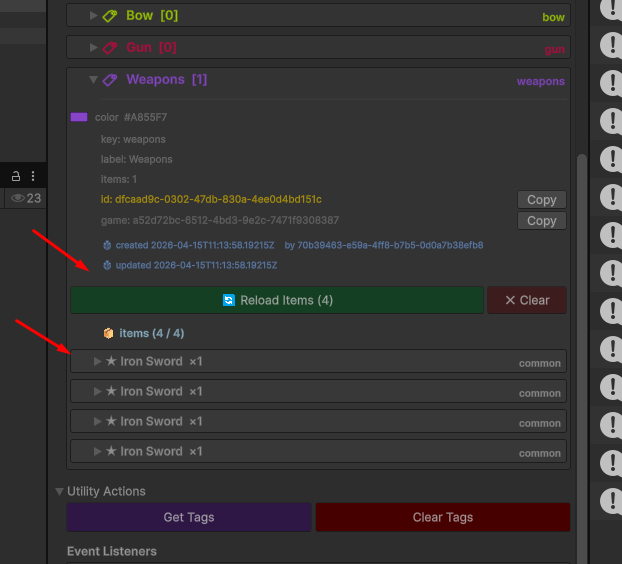
Filtered Inventory: Within each tag object, you can access a list of all items currently owned by the player that carry that specific tag.
Tip: Using tags is the most efficient way to build custom inventory tabs (e.g., "Quest Items," "Consumables," "Epic Loot") in your game's UI.